Showing posts with label peanut butter. Show all posts

Saturday, June 9, 2012

Peanut Butter Chocolate Bars
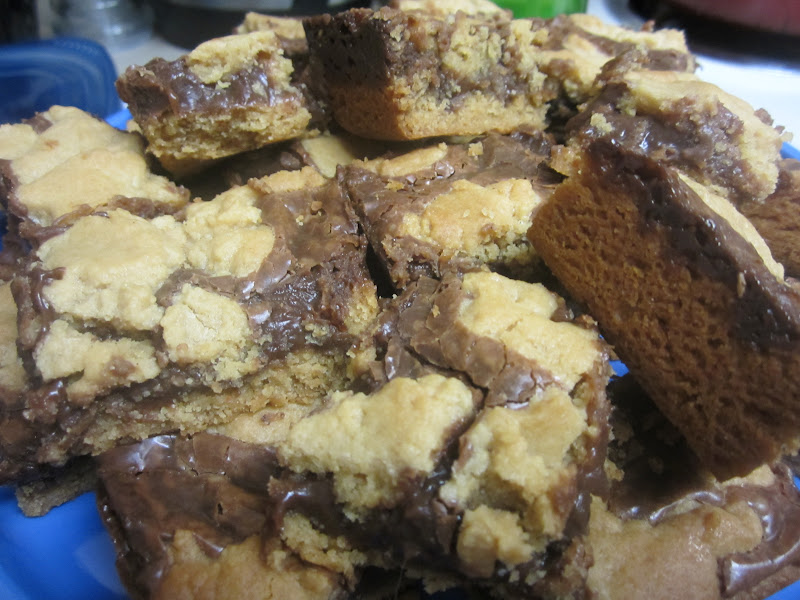
I realized a few weeks ago that while I have pinned many a things on Pinterest, I have done very little with any of them. I haven't crafted, read, fashioned, traveled, redecorated, cooked or baked anything from my boards.

I vowed to change that, and when the urge to bake struck me last weekend, I turned to my "Yummers" board. I found a few recipes that looked good and narrowed them down to what I had the ingredients for in my kitchen.

Enter these beauties. They were easy to make, wowed Tim and won over my coworkers. To describe them as "melt in your mouth" does no justice, and while I originally thought they'd be best serve chilled (as chocolate tends to melt in 5.7 seconds in the Florida summer), I strongly encourage you to try a melt-y bar. 


Ingredients:
1 (18.25) package plain yellow cake mix
1/2 cup butter, melted
1 cup creamy peanut butter (I used reduced-fat)
2 eggs
1 (12 oz) package semi-sweet chocolate chips (I used milk chocolate)
1 (14 ounce) can sweetened condensed milk
2 Tablespoons butter
2 teaspoons vanilla
1 cup coconut (optional)

Directions:
Preheat oven to 325 degrees.


Combine cake mix, melted butter, peanut butter, and eggs in a large bowl using a mixer or spoon. Press this into a 9X13 pan reserving 1 1/2 cup of the mixture to crumble on top.

In a small pot, melt chocolate chips, sweetened condensed milk, and butter. Remove from heat and stir in the vanilla and coconut.

Spread chocolate mixture over the mixture pressed in the pan and then crumble the 1 1/2 cups of reserved cake mixture on top evenly.

Bake for 20-25 minutes. Cool completely before cutting into bars.

Monday, October 4, 2010

Peanut Butter Rice Krispy Treats

I wanted to make something different for our monthly craft gathering in September. I didn't have a lot of time to bake, I wanted something fairly healthy and I was intrigued by a set of recipes, centered around peanut butter, featured in Health magazine.

I decided the dessert-y peanut butter recipe was the one I'd go with, and I substituted the rice cereal I had in my pantry for the brown rice cereal called for in the recipe.

I really liked these bars - they were packed full of protein and were a great snack that was super quick and easy to make. I think they'd be delicious with dried cranberries, too. My only complaint? They got really crumbly when they were out of the refrigerator for an extended period of time. They were yummy and crunchy when they were chilled.

Ingredients:
3/4 cup chunky peanut butter
3/4 cup honey
6 cups crispy brown rice cereal
2/3 cup chopped dried cherries

Directions:

Combine peanut butter and honey in a large pot; cook over medium-low heat until they are melted together (about 2-3 minutes).

Add cereal and cherries to the mixture; stir until sticky.

Press into 9- x 13-inch pan coated with cooking spray. Chill in refrigerator 40 minutes.

Cut in to squares, serve.

Source: Health magazine

Monday, September 13, 2010

Peanut Butter Chocolate Chip Cookies

I hadn't baked for my husband's coworkers in quite some time, and I wanted to thank them for some awesome baby gifts they'd purchased for us.

I checked my cupboards, referenced my recipe books and found an easy cookie recipe that sounded perfect for the occasion.

These were really moist, not overly peanut-buttery and super soft. I didn't have white or yellow cake mix, so I used french vanilla and it worked well. I think chocolate cake mix would work well, too, like the Peanut Butter M&M bars and variation that I made a few months ago.

Ingredients:
2 eggs
1/3 cup butter or margarine, softened
1/2 cup chunky peanut butter
1 yellow or white cake mix
1 cup chocolate chips or chunks

Directions:

Preheat oven to 350 degrees.

With spoon, mix eggs, butter and peanut butter together. Stir in cake mix and then add chocolate.

Drop dough balls on to a lightly greased cookie sheet. Bake 8-12 minutes or until light golden brown around the edges.

Remove cookies and place on non-stick rack to cool.

Source: 101 More Things to Do With A Cake Mix

Monday, June 28, 2010

A variation on Peanut Butter M&M Bars

A few months ago, I made these Peanut Butter M&M Bars. They were ridiculously good.

A coworker of mine has made them several times, and each time she made them, I thought, "I wonder how they would taste with a chocolate cake mix?"

So one night last week, I decided I wanted to bake ... and I decided I was going to experiment with a variation on the recipe.

I used a devil's food cake mix instead of the white or yellow cake mix, and aside from being a little harder to mix together (I had to add a splash of water to get the cake mix to get all of the cake mix to disappear), it was extremely easy to make the substitution.

The end result? And amazingly easy and rich, stick-to-the-roof-of-your-mouth treat. My first thought when I had one was "Annnnddddd now I need a big glass of milk."

Monday, June 7, 2010

Peanut Butter M&M Bars

I hosted our monthly craft gathering in April, and I felt like trying a new recipe. I found one in my tried-and-true "101 More Things to Do With a Cake Mix" recipe book, and I was excited to try it.

I'd been trying to experiment with non-cake mix recipes for a while, but I am very glad I went back to this one. It was flavorful, moist and super easy.

The bars went over so well that I never managed to get a picture of the finished product. Take my word for it, though - if you aren't Meg like peanut butter, this is a good, easy recipe to try.

Ingredients:
1 white or yellow cake mix
2 eggs
1/3 cup vegetable oil
1/2 cup crunchy peanut butter
1-1 1/2 cups M&Ms

Directions:
Preheat oven to 350 degrees. With a spoon, mix cake mix, eggs, oil and peanut butter together in large bowl.


Mix M&Ms into dough.

Press into a lightly greased 9x13-inch pan. Bake 14-18 minutes or until light golden brown around the edges. Cool 15-20 minutes before cutting in to bars.

Source: 101 More Things To Do With A Cake Mix by Stephanie Ashcraft

Friday, January 1, 2010

Tiger Butter Candy

Tiger Butter Candy is a recipe that has been in my family for quite some time. My grandmother made it, then my mother, now my siblings. It was a hit at our cookie table, and I decided to make it again for Christmas parties and gifts.

The only thing I would do differently next time I make it is to not spread the milk chocolate layer all the way out. I think it lessened the marble effect, and if the white chocolate was able to fill in the areas around the milk chocolate, it would marble even further.

My brother told me that when he's made this family treat, he's added a tiny bit of peanut butter when melting the milk chocolate wafers - he said it's helped him avoid burning the chocolate. And I used light cocoa wafers instead of "milk chocolate," although I'm not sure if there's much difference beyond the name.

Ingredients:
2 cups (or 1 lb. bag) of milk chocolate wafers*
2 cups (or 1 lb. bag) of white chocolate wafers*
1 cup of peanut butter (creamy works best, although chunky is okay, same flavor but different texture)

*The wafers can be found in some craft stores or stores carrying Wilton cake decorating/candy making supplies, like Pat Catans, WalMart, Michaels. etc., but if you don't have access to the wafers, Hershey or Nestle chips will also work.

Directions:

Gently melt milk chocolate wafers (or chips) in microwave following instructions on bag.


Pour melted milk chocolate into a 13 x 9 inch pan, no need to spread it end to end (oops. Like I did.).


Immediately melt the white chocolate wafers in the microwave per instructions on the bag. Once melted, add the peanut butter to the bowl and throughly mix this into the melted white chocolate.


Pour over the milk chocolate puddle in the 13x 9 pan and stir/swirl the two chocolates, making sure that the mix goes from end to end and mixes in a swirling marble fashion. Cool at room temp., cut into pieces (small squares or rectangles) once set... usually takes an hour or two, unless it's warm and/or humid.


Source: Family recipe :)

Saturday, December 26, 2009

Peanut Butter Blossoms

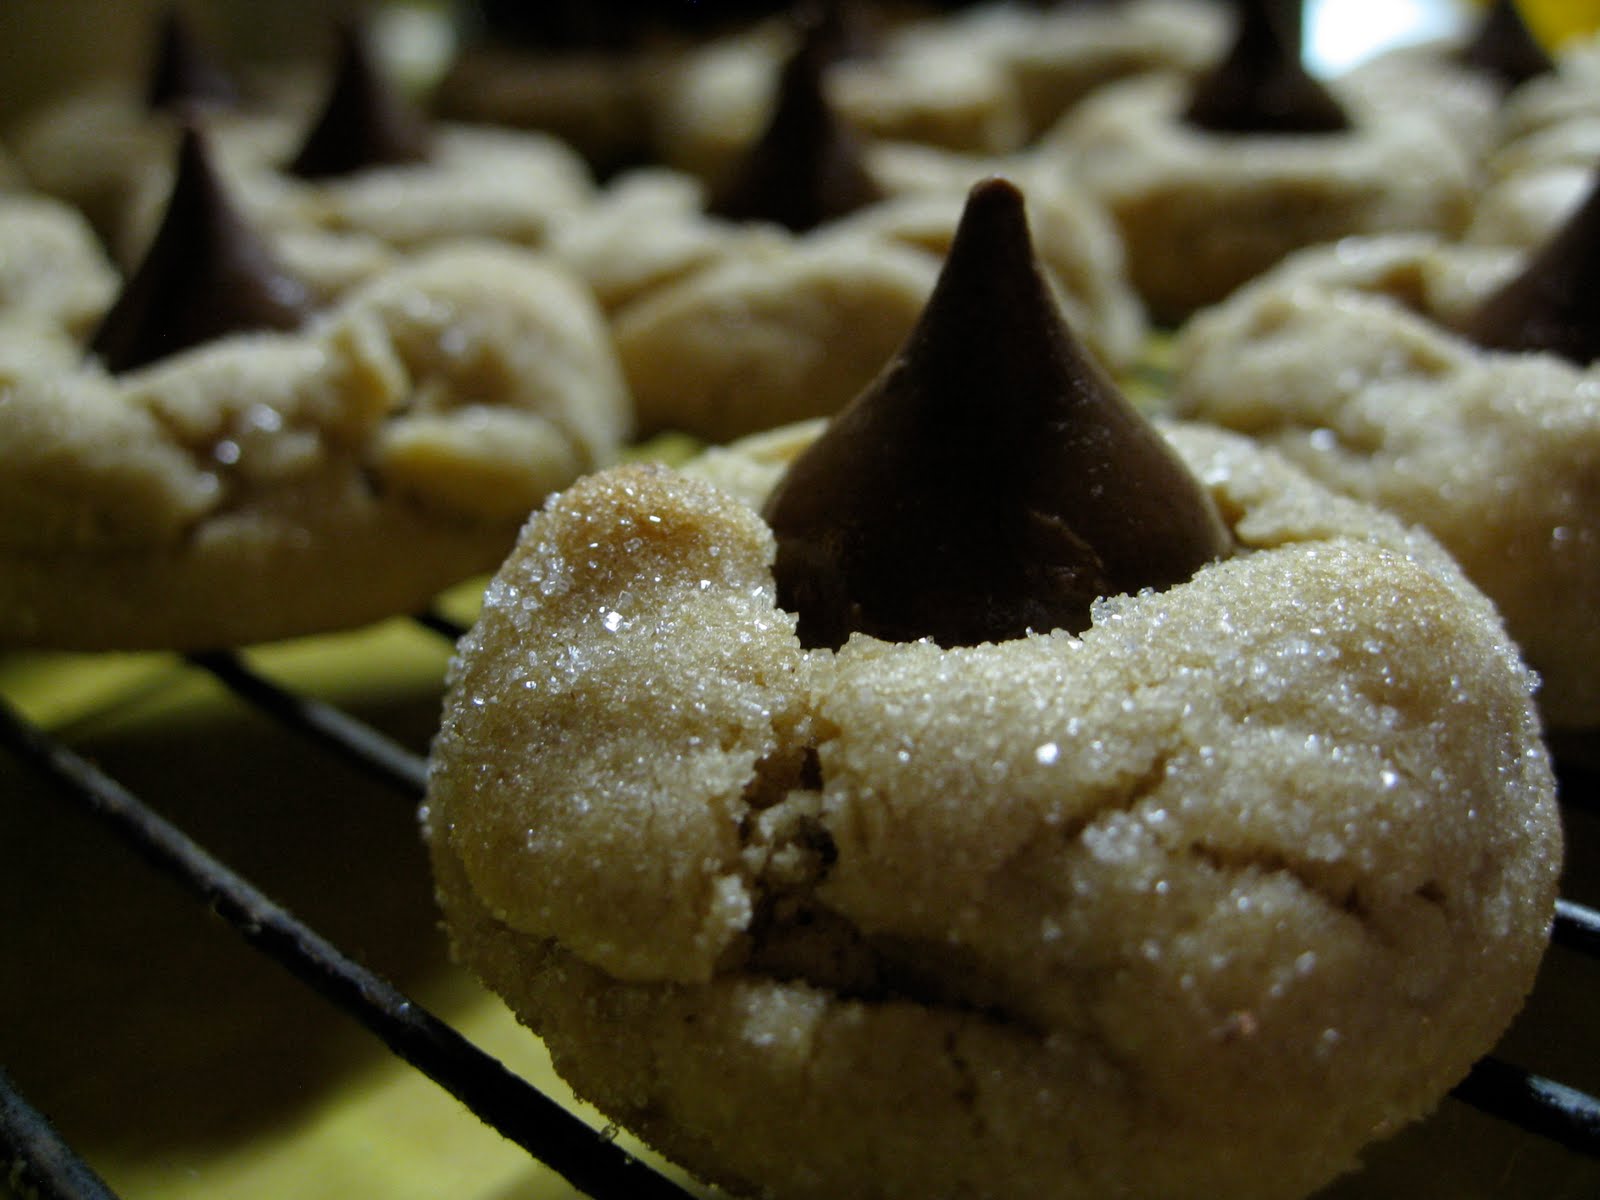
For the last round of Operation Baking Gals, I was home in Ohio for a few days and wanted to get my little brother involved. We knew we were going to make a batch of Cakies, and my mom had a bag of Hershey's Kisses she suggested we use. Alas, we decided to make Peanut Butter Blossoms (aka another recipe that Meghan will never touch because of her deep hatred for peanut butter).

The Peanut Butter Blossoms were always a staple of my family's Christmas cookie making. This particular round of Operation Baking Gals was a few weeks before Christmas, but it still brought back memories of baking for the holidays.

Doug helped mix the dough and unwrapped all of the Kisses. While he unwrapped the Kisses, I rolled the dough in to balls and rolled them in sugar. By the time he was done, the first batch was out of the oven and we hurried to put the Kisses in the still-warm cookies.


Ingredients:


1/2 cup shortening
3/4 cup peanut butter
1/3 cup granulated sugar
1/3 cup packed light brown sugar
1 egg
2 tablespoons milk
1 teaspoon vanilla extract
1 1/2 cup flour
1/2 teaspoon salt
1 teaspoon baking soda
granulated sugar
Hershey's Kisses

Directions:

Heat oven to 375 degrees. Beat shortening and peanut butter in large bowl until well blended.


Add 1/3 cup granulated sugar and brown sugar. Beat until fluffy.

Add egg, milk and vanilla. Beat well.

Stir together flour, baking soda and salt. Gradually beat in to peanut butter mixture.


Shape dough in to 1 inch balls. Roll in granulated sugar and place on ungreased cooie sheet. Bake 8-10 minutes or until lightly browned.

Immediately press a kiss in to center of each cookie. Place on wire rack to cool.


(The recipe I followed said the recipe made 48 cookies. We got about 34, so apparently I need to make my balls of dough smaller next time!)

Source: Little Leopards Purrfect Delights Cookbook

Wednesday, August 19, 2009

Peanut Butter Chocolate Chip Cake

I took one of my favorite cookbooks home with me last month so my little brother, Doug, and I could make one of the recipes from it.

I gave it to Doug on our way home from my grandmother's, and he spent a good 15-20 minutes looking at the recipes. His top choice? Peanut Butter Chocolate Chip Cake. The boy is clearly not his sister's brother when it comes to his love of chocolate - I would pick vanilla any day of the week but most of his interest was in the chocolatey confections.

We made this cake a few nights after Doug's first try at Cakies. This time, I let him do almost all of the legwork, although the cake mix we used called for egg whites, and after I explained to him what that entailed, he quickly decided I should handle the eggs on this one.

Ingredients:
Cake:
1 white cake mix
ingredients called for on back of box
1/2 cup chunky peanut butter (we used creamy)
1 cup chocolate chips

Frosting:
1 can (16 oz.) white frosting
1/4 cup creamy peanut butter
1/2 cup chopped nuts, optional

Directions:


Preheat oven to 350 degrees. Make cake batter as directed on back of box. Mix in peanut butter with electric mixer. Stir in chocolate chips. Pour batter in to a greased 9x13-inch pan. Bake 25-30 minutes or until an inserted toothpick comes out clean. Allow cake to cool completely.


Mix frosting and peanut butter together. Spread over top of cooled cake. Sprinkle with nuts if desired. (Note: We topped the cake with some extra chocolate chips instead of nuts.)

Source: 101 More Things To Do With A Cake Mix by Stephanie Ashcraft

Sunday, July 12, 2009

Peanut Butter Cookies


Otherwise known as "Cookies Meg Will Never Make or Post About." :-)

I honestly don't know why it's been so many years since I've made peanut butter cookies. They seem to remind so many people of fond (or at least vivid) memories. My husband looked at these and told me they looked just like ones his mom used to make. (I pointed out to him that most peanut butter cookies look the same, but thanked him for appreciating my latest endeavor.) My personal memory involves a time around third grade, when my best friend at the time, Carri, came over to work on a school project ... she hid her cookies under the poster board we were working on, but our dog, Maggie, aka Intense Lover of Peanut Butter, sniffed it out and gobbled it up before we even realized the poster board had been unsettled.

I made these cookies to send along with the Hawaiian Delights for Operation Baking Gals. I figured, once again, that even if Sarah, like Meg, and unlike Maggie, didn't like peanut butter, hopefully someone in her unit would.

Ingredients:

1 cup shortening
2 eggs
1 cup sugar
1 cup brown sugar
1 tsp. vanilla
1 cup peanut butter
2 cups sifted flour
2 tsp. baking soda
1/2 tsp. salt

Directions:
Cream shortening, eggs, sugar, brown sugar, vanilla and peanut butter together.

In separate bowl, sift dry ingredients together. Stir in to creamed mix. Drop by rounded teaspooons on ungreased cookie sheet.

Press with fork dipped in sugar making criss-cross. Bake 10 minutes at 350 degres.

Source: Kountze Memorial Lutheran Church cookbook, 1998

Tuesday, April 14, 2009

The Peanut Butter Egg debacle

I hate peanut butter. I hate peanuts. I hate anything that has come into contact with peanut butter or peanuts.

It smells bad, it tastes bad. It's just bad.

I know, I know. You are astounded by the fact that anyone could hate peanut butter or peanuts. You've never heard of such a thing. I'm some kind of freak of nature.

Even so. I hate it.

But I married someone who happens to love peanut stuff, particularly peanut butter eggs at Easter. His mom used to make them each year when he was a kid, and since we now live 2,000 miles from our families, I realized years ago that this responsibility had fallen to me.

So once a year, I buy a jar of JIF and dig my hands into a big mound of peanut butter, powdered sugar, butter and milk to form the filling of the eggs.

Mike begins hovering almost as soon as the mixing begins. He throws around a lot of "How did you get to be so awesome?!" and "Ohhhhhh, lookin good!!"

Once the filling is formed into a couple dozen little egg shapes, they get frozen for an hour. And practically every peanut butter egg recipe I can find says something like the following:

"Dip eggs in chocolate, and place on wax paper to set."

Ok. But dip them HOW? My original recipe says to stick a toothpick in one end and dip into the melted chocolate. But I have experienced three issues with this:

1. Once the frozen eggs starts to unfreeze and get soft, they fall off the toothpick and into the chocolate. So, the first couple of eggs would dip ok, but by the 3rd or 4th, I would start to have problems.

2. The chocolate is so darned thick, and Mike doesn't like a ton of chocolate on his eggs. The filling is the main event, he says. You can't have too much chocolate. I would think he'd want a ton of chocolate to mask the gross peanut butter filling, but what do I know.

3. The toothpick leaves a dumb toothpick-size hole in one end.

I have tried freezing the eggs longer, to keep them harder. I have tried spooning chocolate onto the eggs (this doesn't give proper coverage).

I've even tried just throwing the darn things into the chocolate and pulling them back out (not pretty, and I ended up with chocolate fingers that got chocolate all over everything in my general vicinity).

This year, I went in search of paraffin. This waxy stuff gets melted in with the chocolate and is supposed to make it smoother and easier to work with, and has the added bonus of making the chocolate a little shiny. Very professional-looking.

I went to two stores and couldn't find the elusive paraffin. Sigh.

So desperate times called for additional improvisation. And I can't believe I didn't think of this sooner.

I mixed the filling, formed the eggs and froze them for an hour.


Then I took the eggs out ONE BY ONE (yes, I got chocolate on my freezer door, oops). I stuck a toothpick in them. I dipped them. I scraped off the excess thick chocolate with a spoon. I set them on wax paper.

I let them set for about 30 minutes, and then I removed the toothpicks and (here's the really genius part) I used a fingernail to spread a little extra chocolate over the toothpick hole. You'd never know it was ever there! Here I am, in action:


I know, you all probably thought of this years ago, but it was a major breakthrough for me.

I still have no idea how they taste (Mike seems to approve), but I think this is my best looking batch so far.


Here's the recipe, in case you want to attempt them:

Ingredients
* 2 cups powdered sugar
* 1 cup creamy peanut butter
* 1/4 cup butter
* 1 bag of milk chocolate chips
* Touch of milk, for moisture

Directions
* Combine powdered sugar, peanut butter, butter and milk (if needed for moisture) until blended. Shape mixture into several small eggs. Freeze for 1 hour.
* Place chocolate in top of double boiler. Melt over medium heat, stirring frequently until smooth. Using toothpicks, dip each egg into melted chocolate to cover, then lay on wax paper and allow to harden.

Source: Unknown

Blogger template 'PlainFish' by Ourblogtemplates.com 2008